DEVELOPING A RAYCASTING ‘3D’ ENGINE GAME IN PYTHON AND PYGAME – PART 2

In this post, the addition of the following features to the game engine will be covered:

  1. General Enhancements (Making the numbers of rays scale based on the resolution and splitting the raycasting and drawing functionality into separate functions).
  2. Addition of Sound (for now, only footsteps).
  3. Hiding the mouse cursor.
  4. Add a fullscreen flag (set to run game in fullscreen or window mode).
  5. Adding static flat sprites (same image from all directions).
  6. Convert player angle to 0-360 degree angle (removing the potential for negative values).
  7. Add collision detection with sprites.
  8. Implement a Z-buffer.
  9. Add multi-angle sprites (different images from different viewing angles).

General Enhancements

To scale the number of rays to the resolution the following logic is added in the settings.py file:

NUM_RAYS = int(resX / 4) # Would work with all standard resolutions

All logic related to drawing images to the screen has now been removed from the raycasting function and moved to the drawing.py file. This is done for future extensibility and to facilitate the drawing of items other than walls.

Sound

In order to add the sound of footsteps, the sound clip needs to be loaded into a variable:

step_sound = pygame.mixer.Sound('assets/audio/footstep.wav')

And then, every time the player moves, the clip is played, but first, a check is done to ensure the sound is not already playing. This is to avoid the sound playing over itself, resulting in an audio mess:

if not pygame.mixer.Channel(2).get_busy():
     pygame.mixer.Channel(2).play(pygame.mixer.Sound(step_sound))

Hide Mouse Cursor and Fullscreen

To hide the mouse cursor and add a fullscreen flag, the following code was added to the main.py file:

pygame.mouse.set_visible(False)
screen = pygame.display.set_mode((resX, resY), SET_FULLSCREEN)

With the SET_FULLSCREEN flag begging defined and set in the settings.py file.

Here is the source code with the changes up to this point.

Static Sprites

The next major thing added was static sprites.

Let us now examine how sprites are rendered in the game engine.

Sprites are image files (png files with transparency) that are scaled and positioned to create the appearance of a tangible object in the pseudo-3D world.

The image below illustrates the values at play for determining the sprite positioning and scaling:

Thus

gamma (γ) = theta (θ) – player angle(a)

and

theta (θ) = atan2 (player y, player x)

Where atan2 is used to determine the arctangent of point (y, x) in radians, it has a potential value between -π and π.

The distance from the player to the sprite is calculated as follows:

Distance to Sprite (d) = sqrt(player x ** 2 + player y ** 2) * cos((HALF_FOV – current_ray * DELTA_ANGLE)

where

current_ray = CENTER_RAY + delta_rays

and

delta_rays = int(gamma / DELTA_ANGLE)

and

CENTER_RAY = NUM_RAYS // 2 – 1

Here is the code of how this is implemented:

    def locate_sprite(self, player):
        dx, dy = self.x - player.x, self.y - player.y
        distance_to_sprite = math.sqrt(dx ** 2 + dy ** 2)

        theta = math.atan2(dy, dx)
        gamma = theta - player.angle

        if dx > 0 and 180 <= math.degrees(player.angle) <= 360 or dx < 0 and dy < 0:
            gamma += DOUBLE_PI

        delta_rays = int(gamma / DELTA_ANGLE)
        current_ray = CENTER_RAY + delta_rays
        distance_to_sprite *= math.cos(HALF_FOV - current_ray * DELTA_ANGLE)

        sprite_ray = current_ray + SPRITE_RAYS
        if 0 <= sprite_ray <= SPRITE_RAYS_RANGE and distance_to_sprite > 30:
            projected_height = min(int(WALL_HEIGHT / distance_to_sprite * self.scale), resY*2)
            half_projected_height = projected_height // 2
            shift = half_projected_height * self.shift

            sprite = pygame.transform.scale(self.sprite_object, (projected_height, projected_height))
            return {'image': sprite, 'x': (current_ray * SCALE - half_projected_height), 'y': (HALF_HEIGHT - half_projected_height + shift), 'distance': distance_to_sprite}
        else:
            return None

This logic for this is implemented in the sprite.py file.

For the above logic to function, the player.angle needs to have a value of 0 to 360. This is done by adding the following line to the movement function in the Player class:

self.angle %= DOUBLE_PI 

Here is the source code with static sprite feature added.

Sprite Collision Detection

The next feature added was collision detection with sprites. This functions in the same way as collision detection with walls.

A new dictionary similar to world_map was created called sprite_map, this is used to store the location of all sprites in the game world.

self.sprite_map = {} # used for collision detection with sprites
sprite_location = common.align_grid(sprite.x, sprite.y)
self.sprite_map[sprite_location] = 'sprite'

Next, the player collision detection function was updated as below:

    def check_collision(self, new_x, new_y, sprite_map):
        player_location = align_grid(new_x, new_y)
        if player_location in world_map or player_location in sprite_map:
            #  collision
            print("Center Collision" + str(new_x) + " " + str(new_y))
            return

        player_location = align_grid(new_x - HALF_PLAYER_MARGIN, new_y - HALF_PLAYER_MARGIN)
        if player_location in world_map or player_location in sprite_map:
            #  collision
            print("Top Left Corner Collision" + str(new_x) + " " + str(new_y))
            return

        player_location = align_grid(new_x + HALF_PLAYER_MARGIN, new_y - HALF_PLAYER_MARGIN)
        if player_location in world_map or player_location in sprite_map:
            #  collision
            print("Top Right Corner Collision" + str(new_x) + " " + str(new_y))
            return

        player_location = align_grid(new_x - HALF_PLAYER_MARGIN, new_y + HALF_PLAYER_MARGIN)
        if player_location in world_map or player_location in sprite_map:
            #  collision
            print("Bottom Left Corner Collision" + str(new_x) + " " + str(new_y))
            return

        player_location = align_grid(new_x + HALF_PLAYER_MARGIN, new_y + HALF_PLAYER_MARGIN)
        if player_location in world_map or player_location in sprite_map:
            #  collision
            print("Bottom Right Corner Collision" + str(new_x) + " " + str(new_y))
            return

        if not pygame.mixer.Channel(2).get_busy():
            pygame.mixer.Channel(2).play(pygame.mixer.Sound(self.step_sound))
        self.x = new_x
        self.y = new_y

Here is the source code with sprite collision detection implemented.

Z-Buffer

A Z-buffer is implemented as a storage location for all items (walls and sprites) that have to be drawn to the screen. The content of the Z-buffer is sorted by depth, ensuring that items are rendered in the correct sequence, and items behind other items are thus not visible to the player.

The Z-buffer is implemented as a list of dictionaries, with the structure of the dictionary defined as follows:

{'image': value, 'x': value, 'y':value, 'distance': value}

All walls and sprites to be drawn to the screen are added to the Z-buffer and sorted by distance from the player, starting with the items with the largest distance.

In the drawing.py file the following method is then used to sort the Z-buffer and draw its contents to the screen:

    def world(self, zbuffer):
        zbuffer = sorted(zbuffer, key=lambda k: k['distance'], reverse=True)
        # Sort items by distance to ensure they are drawn in correct sequence, i.e. an item is not drawn in front
        # another if it is closer than other object.
        for item in zbuffer:
            self.screen.blit(item['image'], (item['x'], item['y']))

Multi-Angle Sprites

Multi-angle sprites are sprites where the image rendered to the screen changes based on the player’s viewing angle. This gives the illusion of a 3D object with a front, sides, and a back.

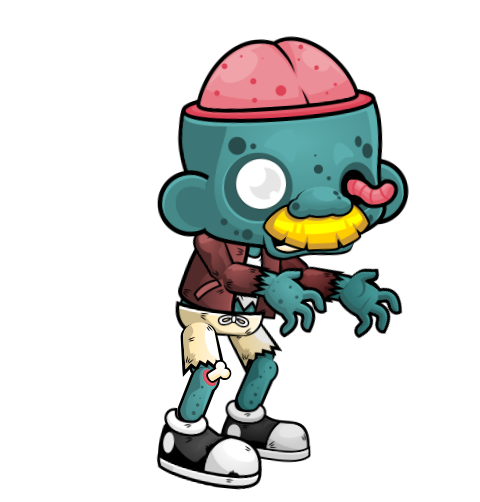
Instead of loading a single image for the sprite, multiple images are loaded into a list as follows:

[pygame.image.load(f'assets/images/sprites/enemy/zombie/{i}.png').convert_alpha()for i in range(4)]

In the above code snippet, four images are loaded (front, left, right, and back), which will result in a choppy rotation effect. Ideally, at least eight images (i.e., angles) would be used for a smoother effect.

In the constructor of the SpriteBase class the following is added:

        if not static:
            sprite_angle_delta = int(360 / len(self.sprite_object))  # Used to determine at what degree angle to
            # change the sprite image- this is based on the number of images loaded for the item.
            self.sprite_angles = [frozenset(range(i, i + sprite_angle_delta)) for i in range(0, 360, sprite_angle_delta)]
            self.sprite_positions = {angle: pos for angle, pos in zip(self.sprite_angles, self.sprite_object)}
            self.sprite_object = sprite_object[0]  # set a default image until correct one is selected

This is used to set the angles at which the image should be changed based on the number of images present and also set the sprite position based on the different angles.

The only other code needed to make this function is adding the following to the locate_sprite function in the SpriteBase class :

            if not self.static:
                if theta < 0:
                    theta += DOUBLE_PI
                theta = 360 - int(math.degrees(theta))

                for angles in self.sprite_angles:
                    if theta in angles:
                        self.sprite_object = self.sprite_positions[angles]
                        break

The above code selects the correct image from the list based on the player’s viewing angle.

Here is the complete sprite.py file with all the above changes included:

import common
from settings import *


class Sprites:
    def __init__(self):
        self.sprite_types = {
            'clock': pygame.image.load('assets/images/sprites/objects/Clock.png').convert_alpha(),
            'zombie': pygame.image.load('assets/images/sprites/enemy/zombie.png').convert_alpha(),
            'zombie360': [pygame.image.load(f'assets/images/sprites/enemy/zombie/{i}.png').convert_alpha()for i in range(4)],
        }

        self.list_of_sprites = [
            SpriteBase(self.sprite_types['clock'], True, (5, 10), 0.6, 1.1),
            SpriteBase(self.sprite_types['zombie'], True, (5, 12), 0.6, 1.1),
            SpriteBase(self.sprite_types['zombie360'], False, (14, 10), 0.6, 1.1),
        ]

        self.update_sprite_map()

    def update_sprite_map(self):
        self.sprite_map = {}  # used for collision detection with sprites - this will need to move when sprites can move
        for sprite in self.list_of_sprites:
            sprite_location = common.align_grid(sprite.x, sprite.y)
            self.sprite_map[sprite_location] = 'sprite'


class SpriteBase:
    def __init__(self, sprite_object, static, pos, shift, scale):
        self.sprite_object = sprite_object
        self.static = static
        self.pos = self.x, self.y = pos[0] * GRID_BLOCK, pos[1] * GRID_BLOCK
        self.shift = shift
        self.scale = scale

        if not static:
            sprite_angle_delta = int(360 / len(self.sprite_object))  # Used to determine at what degree angle to
            # change the sprite image- this is based on the number of images loaded for the item.
            self.sprite_angles = [frozenset(range(i, i + sprite_angle_delta)) for i in range(0, 360, sprite_angle_delta)]
            self.sprite_positions = {angle: pos for angle, pos in zip(self.sprite_angles, self.sprite_object)}
            self.sprite_object = sprite_object[0]  # set a default image until correct one is selected

    def locate_sprite(self, player):
        dx, dy = self.x - player.x, self.y - player.y
        distance_to_sprite = math.sqrt(dx ** 2 + dy ** 2)

        theta = math.atan2(dy, dx)
        gamma = theta - player.angle

        if dx > 0 and 180 <= math.degrees(player.angle) <= 360 or dx < 0 and dy < 0:
            gamma += DOUBLE_PI

        delta_rays = int(gamma / DELTA_ANGLE)
        current_ray = CENTER_RAY + delta_rays
        distance_to_sprite *= math.cos(HALF_FOV - current_ray * DELTA_ANGLE)

        sprite_ray = current_ray + SPRITE_RAYS
        if 0 <= sprite_ray <= SPRITE_RAYS_RANGE and distance_to_sprite > 30:
            projected_height = min(int(WALL_HEIGHT / distance_to_sprite * self.scale), resY*2)
            half_projected_height = projected_height // 2
            shift = half_projected_height * self.shift

            if not self.static:
                if theta < 0:
                    theta += DOUBLE_PI
                theta = 360 - int(math.degrees(theta))

                for angles in self.sprite_angles:
                    if theta in angles:
                        self.sprite_object = self.sprite_positions[angles]
                        break

            sprite = pygame.transform.scale(self.sprite_object, (projected_height, projected_height))
            return {'image': sprite, 'x': (current_ray * SCALE - half_projected_height), 'y': (HALF_HEIGHT - half_projected_height + shift), 'distance': distance_to_sprite}
        else:
            return None

Here is the source code with the Z-buffer and multi-angle sprites implemented.

Load Maps From File

To make changing the map and loading different maps easier, the map layout is now defined in a text file and loaded when needed.

The map.py file has been modified as per below:

from settings import *

game_map = []
with open('map/map01.txt') as f:
    for line in f:
        game_map.append(line.strip())

# map size
map_height = len(game_map) * GRID_BLOCK
map_width = len(game_map[0]) * GRID_BLOCK

world_map = {}
for j, row in enumerate(game_map):
    for i, char in enumerate(row):
        if char != '0':
            if char == '1':
                world_map[(i * GRID_BLOCK, j * GRID_BLOCK)] = '1'
            elif char == '2':
                world_map[(i * GRID_BLOCK, j * GRID_BLOCK)] = '2'
            elif char == '3':
                world_map[(i * GRID_BLOCK, j * GRID_BLOCK)] = '3'

The line.strip() function is used to remove the newline character from the end of each line.

The text file where the map is defined is shown in the image below:

Here is the source code where map loading from a file is implemented.

The next things I am going to be working on is adding moving sprites and also adding interactive elements to the game world, including doors that open and close. Keep an eye out for future posts that will cover new features I have implemented.

DEVELOPING A RAYCASTING ‘3D’ ENGINE GAME IN PYTHON AND PYGAME – PART 2

Developing a Raycasting ‘3D’ Engine Game in Python and PyGame – PART 1

I have started developing a raycasting game in Python (using PyGame) as a learning exercise and to get a better understanding of the math and techniques involved.

Raycasting is a graphic technique used to render pseudo-3D graphics based on a 2D game world. The best-known example of a raycasting engine used in a computer game is probably Wolfenstein 3D, developed by id Software in 1992.

So firstly, here are some resources I used to upskill and get my head around the topic:

YouTube tutorial series by Standalone Coder. These videos are in Russian, but the YouTube subtitles do a good enough job to follow along.

YouTube tutorial series by Code Monkey King.

Lode’s Computer Graphics Tutorial.

Lastly, I recommend the book Game Engine Black Book: Wolfenstein 3D by Fabien Sanglard, it is not an easy read, but it gives excellent insight into the development of Wolfenstein 3D and a great deal of information into the intricate details of Raycasting and texture mapping.

The Basics of Raycasting

The first thing to understand is that Raycasting is not true 3D, but rather rendering a 2D world in pseudo 3D. Therefore, all movement and game positions consist of only x and y positions, with no height or z positions.

The entire game world consists of a grid, with some blocks in the grid being populated with walls and others being empty. An example of this is shown in the picture below:

In the current version of the game, the world map is implemented as a list of strings, where each character in the string represents a block in the grid. The ‘0’ character represents an empty block, and all other numbers represent a wall. The numbers ‘1’, ‘2’, and ‘3’ are used to show different wall textures according to the different numbers, something covered later in this post.

game_map = [
    '11111111111111111111',
    '10000000000003330001',
    '10011100000000000001',
    '10030000000000000001',
    '10020000000000300001',
    '10020001110000000001',
    '10000330000000000001',
    '10000330000000000001',
    '10000330000000000001',
    '10000330000000000001',
    '10000330000000000001',
    '10000330000000000001',
    '10020000000000300001',
    '10020001110000000001',
    '10000330000000000001',
    '10000330000000000001',
    '10020000000000300001',
    '10020001110000000001',
    '10000330000000000001',
    '11111111111111111111'
]

This is then converted into a dictionary as follows:

world_map = {}
for j, row in enumerate(game_map):
    for i, char in enumerate(row):
        if char != '0':
            if char == '1':
                world_map[(i * GRID_BLOCK, j * GRID_BLOCK)] = '1'
            elif char == '2':
                world_map[(i * GRID_BLOCK, j * GRID_BLOCK)] = '2'
            elif char == '3':
                world_map[(i * GRID_BLOCK, j * GRID_BLOCK)] = '3'

The player is placed on this grid with a x and y coordinates determining the player’s position on the grid. Along with the x and y coordinates, the player also has a viewing angle, i.e., a direction the player is facing.

Now that we have the foundation in place, we can get to the raycasting.

To understand this concept, imagine a line originating from the player and heading off in the direction the player is facing.

Now, this is not an endless line, but rather a line that keeps expanding from one world grid line to the next. (this is done with a for loop).

At every point where this ‘ray’ intersects a grid line on the game world, a check is done to determine if the grid line in question is a wall or not.

If it is a wall, the loop expanding the line is stopped, and the x and y coordinates where the wall was intersected will be noted. We will use this a bit later when drawing the pseudo-3D rendering of the world.

The above is the simplest form of raycasting. However, a single ray will not give us a usable amount of information to do the pseudo-3D render with. This is where a player’s FOV (field of view) and more rays come in.

The Player FOV is an angle on the game world originating at the player and extending out in a triangular form. This determines where the player’s visible range at present begins and ends. For this game, I will use a FOV of 60% (i.e., pi/3).

To change the FOV, the following can be used as a guide:

RadiansDegrees
π / 630°
π / 4 45°
π / 360°
π / 290°
π 180°

Within this FOV, several rays will be generated, exactly as per the single one in the example discussed earlier.

In this game, a value of 480 rays has been defined, which will be generated within the FOV, so the process above for a single ray will be repeated 480 times, with each ray cast having its angle increased by a marginal amount from the previous ray.

The angle of the first ray will be determined as follows:

Starting angle = Player Angle – Half the FOV

Where Player Angle is defined as the center point of direction player is facing.

For each subsequent ray, the angle of the ray will be increased by a delta angle calculated as followed:

Delta Angle = FOV/Number of Rays

This will allow for a sufficient set of information to draw a pseudo-3D rendering from.

To see how this is implemented, please look at lines 6 to 39 in the raycasting.py file.

Sine and Cosine functions are used to determine the intersecting coordinates, and if you require a refresher on these functions, I recommend this web article from mathisfun.com.

For calculating the y coordinate where the ray intersects with a wall, the following formula is used:

y = (player y) + depth * sin(ray angle)

And to calculate the x coordinate where the ray intersects with a wall, the following formula is used:

x = (player x) + depth * cos(ray angle)

For depth value in the above formulas, a sequence of numbers would usually be looped through, starting at 0 and ending at some defined maximum depth.

The above formulas would then be executed at each new depth level to get the corresponding x and y coordinates.

This does provide the desired results, but it is not very optimized.

To improve the performance of this operation, the Digital Differential Analyzer (DDA) algorithm will be used. At a high level, the DDA algorithm functions by not checking every pixel of the 2D game world for an intersection of a ray and a wall but only checking on the grid lines of the 2D world (the only place where walls can occur).

To implement the DDA algorithm, we are going to need four extra variables in conjunction with the Player x and y coordinates, namely:

dx and dy – these two variables will determine the step size to the next grid line. Based on the direction of the angle, these either have the value of 1 or -1.

gx and gy – This will be the x and y coordinates of the grid lines that will be iterated through, starting with the grid line the closest to the player x and y position. The initial value is determined using the following function, located in the common.py file:

def align_grid(x, y):
    return (x // GRID_BLOCK) * GRID_BLOCK, (y // GRID_BLOCK) * GRID_BLOCK

This will ensure that the returned x and y coordinates are located on the closet grid line (based on game world tile size). For reference, the // operator in Python is floor division and rounds the resulting number to the nearest whole number down.

To determine the depth to the next y-axis grid line, the following equation will be used:

Depth Y = (gx – player x) / cos (ray angle)

And to determine the depth of the next x-axis grid line, this equation is used:

Depth X = (gy – player y) / sin (ray angle)

The below two code blocks implement what was just described, the first block of code is to determine intersections with walls on the y axis of the world map:

        # checks for walls on y axis
        gx, dx = (xm + GRID_BLOCK, 1) if cos_a >= 0 else (xm, -1)
        for count in range(0, MAX_DEPTH, GRID_BLOCK):
            depth_y = (gx - px) / cos_a
            y = py + depth_y * sin_a
            tile_y = align_grid(gx + dx, y)
            if tile_y in world_map:
                # Ray has intersection with wall
                texture_y = world_map[tile_y]
                ray_col_y = True
                break
            gx += dx * GRID_BLOCK

And the next block of code is to determine intersections with walls on the x axis of the world map:

        # checks for walls on x axis
        gy, dy = (ym + GRID_BLOCK, 1) if sin_a >= 0 else (ym, -1)
        for count in range(0, MAX_DEPTH, GRID_BLOCK):
            depth_x = (gy - py) / sin_a
            x = px + depth_x * cos_a
            tile_x = align_grid(x, gy + dy)
            if tile_x in world_map:
                # Ray has intersection with wall
                texture_x = world_map[tile_x]
                ray_col_x = True
                break
            gy += dy * GRID_BLOCK

texture_x and texture_y are used to store the index of the texture to display on the wall. We will cover this later in this post.


Now that we have the raycasting portion covered, which is the most complex, we can focus on simply rendering the pseudo-3D graphics to the screen.

At a very high level, the basic concept of how the pseudo-3D graphics will be created, is to draw a rectangle for every ray that has intersected a wall. The x position of the rectangle will be based on the angle of the ray. The y position will be determined based on the distance of the wall from the player, with a width of the rectangle equal to the distance between the rays (calculated with Window resolution width / Number of Rays) and a user-defined height.

This will create a very basic pseudo-3D effect, and it would be much nicer using textured walls.

To implement textured walls the concept remains the same, but instead of just drawing rectangles, we will copy a small strip from a texture image and draw that to the screen instead.

In the code blocks above, there were two variables texture_x and texture_y. Where a wall intersection did occur these variables will contain a value of ‘1’, ‘2’ or ‘3’ based on the value in the world map, and these correspond to different textures that are loaded in a dictionary as follows:

textures = {
                    '1': pygame.image.load('images/textures/1.png').convert(),
                    '2': pygame.image.load('images/textures/2.png').convert(),
                    '3': pygame.image.load('images/textures/3.png').convert(),
                    'S': pygame.image.load('images/textures/sky.png').convert()
                   }

Firstly the correct section of the texture needs to be loaded based on the ray’s position on the wall. This is done as follows:

wall_column = textures[texture].subsurface(offset * TEXTURE_SCALE, 0, TEXTURE_SCALE, TEXTURE_HEIGHT)

Depending if it is for a x-axis or y-axis wall, the follwoing values will be as follows:

For a x-axis wall:

texture = texture_x

offset = int(x) % GRID_BLOCK

Where x is the x coordinate of the wall intersection.

And for a y-axis wall:

texture = texture_y

offset = int(y) % GRID_BLOCK

Where y is the y coordinate of the wall intersection.

Next, the section of the texture needs to be resized correctly based on its distance from the player as follows:

wall_column = pygame.transform.scale(wall_column, (SCALE, projected_height))

Where the values are determined as below:

projected_height = min(int(WALL_HEIGHT / depth), 2 * resY)

resY = Window Resolution Height

For a x-axis wall:

depth = max((depth_x * math.cos(player_angle – cur_angle)),0.00001)


For a y-axis wall:

depth = max((depth_y * math.cos(player_angle – cur_angle)),0.00001)

The last thing to do then is to draw the resized texture portion to the screen:

sc.blit(wall_column, (ray * SCALE, HALF_HEIGHT - projected_height // 2))

The above operations of copying a section of a texture, resizing it, and drawing it to the screen is done for every ray that intersects a wall.

The last thing to do and by far the least complex is to draw in the sky box and the floor. The sky box is simply an image, loaded in the texture dictionary under the ‘S’ key, which is drawn to the screen. The sky box is drawn in three blocks:

        sky_offset = -5 * math.degrees(angle) % resX
        self.screen.blit(self.textures['S'], (sky_offset, 0))
        self.screen.blit(self.textures['S'], (sky_offset - resX, 0))
        self.screen.blit(self.textures['S'], (sky_offset + resX, 0))

This ensures that no gap appears as the player turns and creates the impression of an endless sky.

Lastly, for the floor, a solid color rectangle is drawn as below:

pygame.draw.rect(self.screen, GREY, (0, HALF_HEIGHT, resX, HALF_HEIGHT)) 

For reference, the following PyGame functions are used in the game up to this point:

pygame.init
Used to initialize pygame modules and get them ready to use.

pygame.display.set_mode
Used to initialize a window to display the game.

pygame.image.load
Used to load an image file from the supplied path into a variable to be used when needed.

pygame.Surface.subsurface
Used to get a copy of a section of an image (surface) based on the supplied x position,y position, width, and height values.

pygame.transform.scale
Used to resize an image (surface) to the supplied width and height.

pygame.Surface.blit
Used to draw images to the screen.

pygame.display.flip
Used to update the full display Surface to the screen.

pygame.Surface.fill
Used to fill the display surface with a background color.

pygame.draw.rect
Used to draw a rectangle to the screen (used for the floor).

Also used pygame.key.get_pressed, pygame.event.get and pygame.mouse methods for user input.

Collision Detection

Because the game plays out in a 2D world, collision detection is rather straightforward.

The player has a square hitbox, and every time the player inputs a movement, the check_collision function is called with the new x and y positions the player wants to move to. The function then uses the new x and y positions to determine the player hitbox and check if it is in contact with any walls; if so, the move is not allowed. Otherwise, the player x and y positions are updated to the new positions.

Here is the check_collision function that forms part of the Player class:

 def check_collision(self, new_x, new_y):
        player_location = mapping(new_x , new_y)
        if player_location in world_map:
            #  collision
            print("Center Collision" + str(new_x) + " " + str(new_y))
            return

        player_location = mapping(new_x - HALF_PLAYER_MARGIN, new_y - HALF_PLAYER_MARGIN)
        if player_location in world_map:
            #  collision
            print("Top Left Corner Collision" + str(new_x) + " " + str(new_y))
            return

        player_location = mapping(new_x + HALF_PLAYER_MARGIN, new_y - HALF_PLAYER_MARGIN)
        if player_location in world_map:
            #  collision
            print("Top Right Corner Collision" + str(new_x) + " " + str(new_y))
            return

        player_location = mapping(new_x - HALF_PLAYER_MARGIN, new_y + HALF_PLAYER_MARGIN)
        if player_location in world_map:
            #  collision
            print("Bottom Left Corner Collision" + str(new_x) + " " + str(new_y))
            return

        player_location = mapping(new_x + HALF_PLAYER_MARGIN, new_y + HALF_PLAYER_MARGIN)
        if player_location in world_map:
            #  collision
            print("Bottom Right Corner Collision" + str(new_x) + " " + str(new_y))
            return

        self.x = new_x
        self.y = new_y

Here is a video of the current version of the game in action:

The current version of this game is still a work in progress, but if you are interested, the source code can be downloaded here and the executable here.

Some of the next things on the to-do list are loading levels from the file, adding sprites to the game world, and adding some interactive world items, such as doors that open and close.

I will keep creating posts on this topic as I progress with this project.

Developing a Raycasting ‘3D’ Engine Game in Python and PyGame – PART 1