Book Review – Build Your Own Humanoid Robots

Book Cover

The first thing to note is that this book does not cover any Arduino-based robots. All the robots are based on PIC micro-controllers. Also note that this book goes into very low-level detail, even covering the fabrication of your own Printed Circuit Boards.

But even considering the above-mentioned I found this book extremely useful, not because of the electronic sections, but because of the mechanical build sections. 

The book shows exactly what raw materials to buy, what tools you will require and how to assemble the robots chassis and mechanical parts. And all these can easily be incorporated into an Arduino-based robot.

All six projects in the book can also be made to work with an Arduino without too much difficulty, all it will require is a bit of creativity and understanding of Arduino. 

For someone interested in Arduino based robots this book might not be the complete package, but the mechanical sections are some of the best I have ever seen in a book. If you are however interested in PIC-based robotics this book is a must buy.

Book Review – Build Your Own Humanoid Robots

Pololu Zumo 32U4 Robot

zumo32u4

In a previous post I looked at the Pololu Robot shield for Arduino, which was a robot shield on top of which a Arduino UNO R3 plugged into to form a great little autonomous robot.

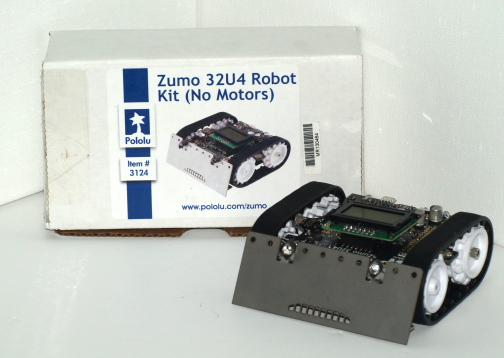
Today we will be looking at the Pololu Zumo 32U4 Robot, a robot similar in size to the Zumo Robot shield for Arduino, but with quite a few changes. Firstly it no longer requires a separate Arduino board as it has an Arduino compatible micro-controller directly integrated into its main-board. It also has a LCD screen and IR proximity sensors which the previously mentioned robot did not have.

The Zumo Robot shield for Arduino came with 75:1 HP motors which produce average speed and torque. In the new Zumo I am installing 100:1 HP motors which are slower that the 75:1 HP motors but produce a lot more torque (which will be great for pushing in Robot Sumo matches).

Similarly to the Zumo Robot shield for Arduino the robot also has an expansion area that can be used to connect additional sensors and actuators. As with the Zumo Robot shield for Arduino various different operating source code can be downloaded from Pololu website, that changes the robot into anything from a sumo fighter to a line follower or even an auto-balancing robot, to name a few.

I bought the Zumo 32U4 Robot kit, which required assembly (unlike the Zumo Robot shield for Arduino that only required an Arduino to be plugged in). 

Here is a time Lapse of the robots assembly. 

I really like the Pololu Zumo series of robots and find them reliable, easy to develop for and a great deal of fun. There are various options available, from fully assembled to kit form depending what you are interested in.

zumos

And now that I have two, I can finally have some Robot Sumo fights, so expect some videos of that soon.

Pololu Zumo 32U4 Robot

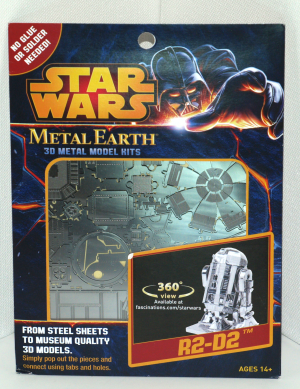
Metal Earth – R2D2

r2d2package

Metal Earth is a range of laser cut 3D models. They have the rights to various licensed models from series such as Star Wars and Halo. I picked up the R2D2 model and decided to give it a try.  

r2d2parts2

So it took me a very long time to assemble the model, and it was not easy. The model has various tiny pieces (I spent a lot of time crawling around the floor looking for dropped pieces no bigger than a large grain of sand) and I found normal needle nose pliers too big for most of the assembly.

Assembly of the model was extremely frustrating and I believe for anyone with large hands building these models would be nearly impossible.

The model came out looking ok, but not close to the one on the packaging and I can only assume they got a neurosurgeon with the hand size of a small child to assemble the one displayed. 

r2d2

These models are a novel idea, and I believe that if you build numerous models and invest in specialised tools, eventually you can become better at building them. But even considering this, I cannot recommend these models to anyone except the most dedicated and experienced model builders. They are simply too frustrating and finicky to assemble. Simply put, it wasn’t fun.

Metal Earth – R2D2

Elecfreaks Arduino Advanced Kit

Box2

The Elecfreaks Arduino Advanced Kit is an AWSOME product. It contains everything you need to build some impressive Arduino based projects, including a MP3 player, an Alcohol tester and a Tetris game to name a few.

The Kit includes:

  • 1 x Freaduino UNO    
  • 1 x mini USB cable
  • 1 x TFT1.8 LCD 
  • 1 x Octopus ADKey     
  • 1 x Octopus Passive Buzzer Brick    
  • 1 x Octopus MQ3 Gas Sensor Brick     
  • 1 x MP3 Module     
  • 1 x Color Sensor     
  • 1 x 9 DOF Module
  • 1 x ESP8266 Serial Wi-Fi Module
  • 1 x BLE Adapter 
  • 1 x One Channel Relay Brick 
  • 1 x Octopus 5mm LED Brick
  • 1 x 9V AA Battery Holder
  • 30 x Jumper wires

The Kit comes with an Arduino compatible Freaduino board, which is simply an Arduino UNO R3 manufactured by Elecfreaks.

All the components come individually packed in small boxes (all of which are clearly labeled) and it is really well presented.

The kit also includes color printed cards illustrating each project and how to assemble it. Additionally the kit has a wiki page (http://www.elecfreaks.com/wiki/index.php?title=Arduino_Advanced_Kit_-_EN), which contains the source code for all the projects.

The Elecfreaks Arduino Advanced Kit is great value as it is less expensive than buying all the individual components separately (and also a great deal more convenient).

I highly recommend this kit to anyone interested in developing/building in the Arduino space.  

Elecfreaks Arduino Advanced Kit

IoT

I am starting an IoT project and wanted to share a little bit.  IoT or the Internet of Things is defined on Wikipedia as “the network of physical objects—devices, vehicles, buildings and other items embedded with electronics, software, sensors and network connectivity—that enables these objects to collect and exchange data. The Internet of Things allows objects to be sensed and controlled remotely across existing network infrastructure, creating opportunities for more direct integration of the physical world into computer-based systems, and resulting in improved efficiency, accuracy and economic benefit;”.  

To learn more I would recommend the book The Internet of Things Do-It-Yourself at Home Projects for Arduino, Raspberry Pi, and BeagleBone Black by Donald Norris. It provides an in-depth technical overview of concepts as well as some projects that can be built. The projects in the book are not particularly exciting but they do a good job at illustrating concepts and methods utilised.

Book

So I am going to be using a Raspberry Pi2 running Windows 10 IoT core, which will be communicating with some Arduino boards.

I am also looking at integrating with Azure Machine Learning to do some interesting things. 

I have not decided on many elements of the final project, but it will involve a robot.

rasp

On a side note, do not try to deploy Windows 10 IoT Core on a SD card using a Mac, it is a huge pain. My main computer I use at home (and for most of my development, blogging, video editing, etc.) is a MacBook Pro and in the end I gave up trying to get the deploy working and used my windows laptop which worked almost instantaneously.

Once I have decided exactly what I want to achieve and made some progress I will post more on this topic.

IoT

Insectbot Mini DIY Kit

InsectMain

I have previously built an Insectbot using instructions from the Internet, but subsequently DFRobot have created a kit that conveniently contains everything you need to build one without the need of finding and buying all the components individually.

InsectBoxOpen

This is a very easy little robot to assemble and is great for beginners, with one exception, the piece of plastic used for the robots head needs to be cut and holes made through, which sounds easy enough…. However do not be fooled, as it is the most brittle and fragile piece of plastic I have ever seen. Not breaking it is nearly impossible. Luckily it can easily be replaced with any other piece of flat plastic, such as a plastic container lid, etc.  

The robot uses a rechargeable battery, which is very convenient and comes with an adapter to charge via USB. 

InsectContent2

Here is a time-lapse video of the robots assembly.

The kit is relatively inexpensive and is a great little kit (with the exception of the plastic used for the robots head) and I would recommend it for anyone interested in getting started. The Beetle board used in the robot is fully Arduino compatible and can be developed for using the Arduino IDE.

A basic version of operating code can be downloaded from the products web page (http://www.dfrobot.com/index.php?route=product/product&product_id=1055#.Vtke2JN97fZ). This can be modified as much as you like to truly make the little robot your own.

Here is a video of the little guy in action. Just take note of one shortcoming, and that is that they really struggle to get traction when walking, so some custom shoes will help (I used some cork from a wine bottle, which I cut into little feet.) 

Insectbot Mini DIY Kit

KillerRobotics is BACK!

Firstly, apologies for the long delay since my last post. I have been very busy at work and I have also been away for 3 weeks (I went to Seattle between end January and mid February for work and vacation.) 
Here are some photos from the Trip!

Now secondly and most importantly, I am working on a few new posts on some robots I am currently working on and I will be posting them in the near future. So stay tuned, things are going to be picking up. 

KillerRobotics is BACK!