
When a 3D print completes printing, it seldom looks like a refined and finished item, from support material that needs to be removed to rough edges that need to be smoothed, quite a bit of work is required to make a 3D print look acceptable.


Here is a quick guide of how I finish my 3D prints to look less like 3D printed items and more like professionally produced commercial products.
Let us first look at the tools I use in the finishing process:

Wire Cutting Pliers and Long Nose Pliers – These are useful when removing support material from 3D prints.

Wire Brushes – Perfect for a first pass cleanup on newly printed items to remove any stringing and excess material.
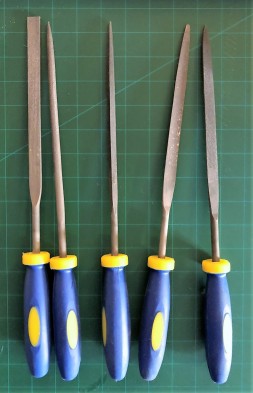
Needle Files – Useful for smoothing rough spots on prints, especially in small confined areas.
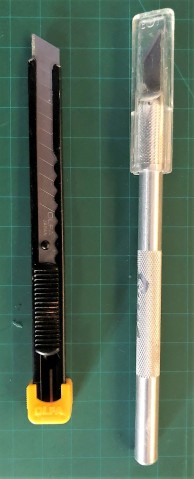
Craft Knives – To remove any stubborn unwanted material from 3D prints.

Model Sanding Block – For standing confined areas of 3D prints.

Heated 3D Print Finishing Tool – Perfect for removing stringing and extra material from 3D prints.

Sand Paper – Used for general smoothing of 3D prints. It is best to wet sand 3D prints as it prevents the print from melting and getting ruined by the heat created from sanding friction.

Wood Filler – Used to fill any unwanted gaps and holes in 3D prints.
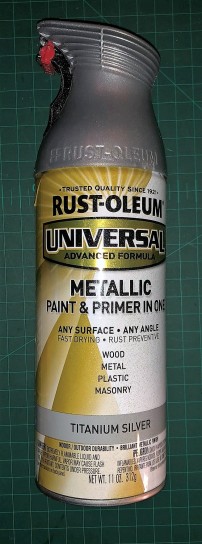
Spray Paint Primer – This is used to prime 3D prints for painting. Priming also hides small imperfections on 3D prints. Use a primer that is plastic friendly.

Model Paint and Brushes – I like Tamiya model paint and brushes, but any model paint supplies should work great.
Now let us look at the finishing process.
Step 1: Select a model and 3D print it.


It is very important to note that the better your 3D printer is maintained and configured, the better the end results will be. Here is an example of the same model 3D printed and finished. The first was printed before I replaced my hot end and did some basic maintenance on my 3D printer (the nozzle was worn, and the heater cartridge started giving issues, I also tightened the belts). The second was printed after I completed the replacement and maintenance.


The print lines in the first print are clearly visible, even after sanding, while the second model has a smooth finish even with minimal sanding.
Step 2: Remove support material, initial sanding, and filler.


Using wire brushes to do a quick pass over the 3D print to remove any excess material, then sand model using wet sanding method (using sandpaper and water). When sanding the 3D print, start standing with coarse-grit sandpaper (60 grit) and work down to a finer grit (220 grit). Finally, fill any gaps using wood filler.
Step 3: Final Sanding.


When the wood filler has dried, go over the print one final time with very fine grit sandpaper (400 grit).
Step 4: Priming the 3D print


When spraying the 3D print with primer, it is important to hold the spray can at least 30cm away from the 3D print and do long even passes over the model, starting and ending each pass to the side of the 3D print and not directly on the print as it will result in droplets forming.
Step 5: Painting the 3D print

After the primer has completely dried, it is time to paint the model as desired. Using a wethering technique like black-washing brings out the detail of 3d prints amazingly. Black-washing is done by mixing black (or dark color) paint with some paint thinners, then painting all over the model, putting particular focus on getting the paint into all the nooks and crannies on the print. Then finally wiping away most of the paint with some paper towel. This gives the model a weathered realistic look.
Step 6: Done!


And finally, display your newly created item with pride.

Awesome! finished T800 skull looks amazing!! 🙂
LikeLiked by 1 person
[…] 3D Print Finishing […]
LikeLike